The last few weeks have been busy: I’ve been working on a prototype for rendering a 3D landscape. One of the key aspects of the game that I’m working on is the deity-like ability of the player to manipulate the game world. The game engine will need to support real-time dynamic transformations like raising and lowering of the terrain. I’m also still trying to figure out the scale of the game world, and I was hoping that this prototype would let me experiment with different options.
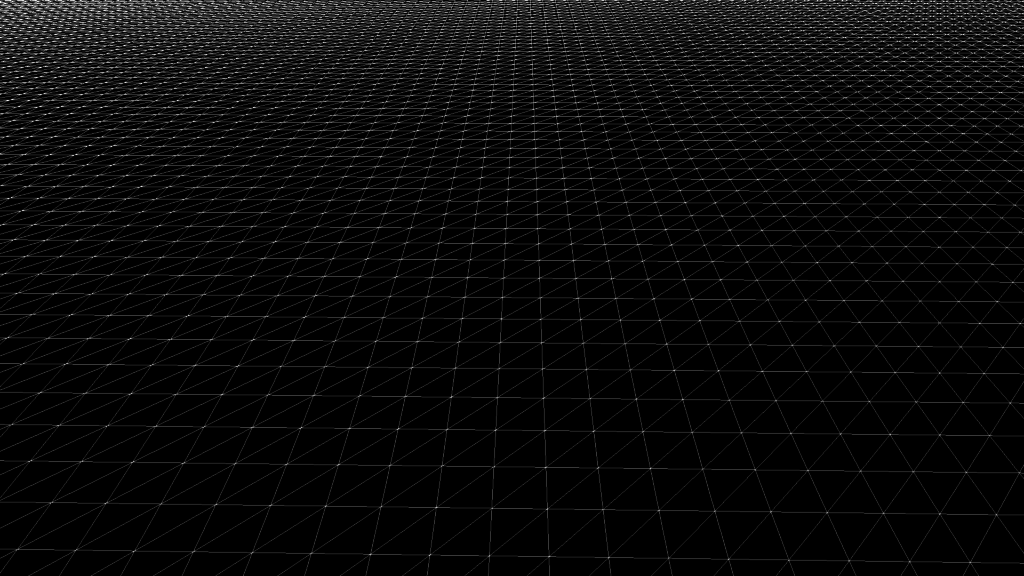
A basic approach to rendering terrain in 3D is to start with a regular grid:
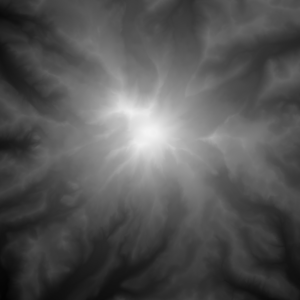
The elevation at each point is stored in a separate 2D height-map. Dark areas indicate low elevation whereas bright spots represent hills and mountains:
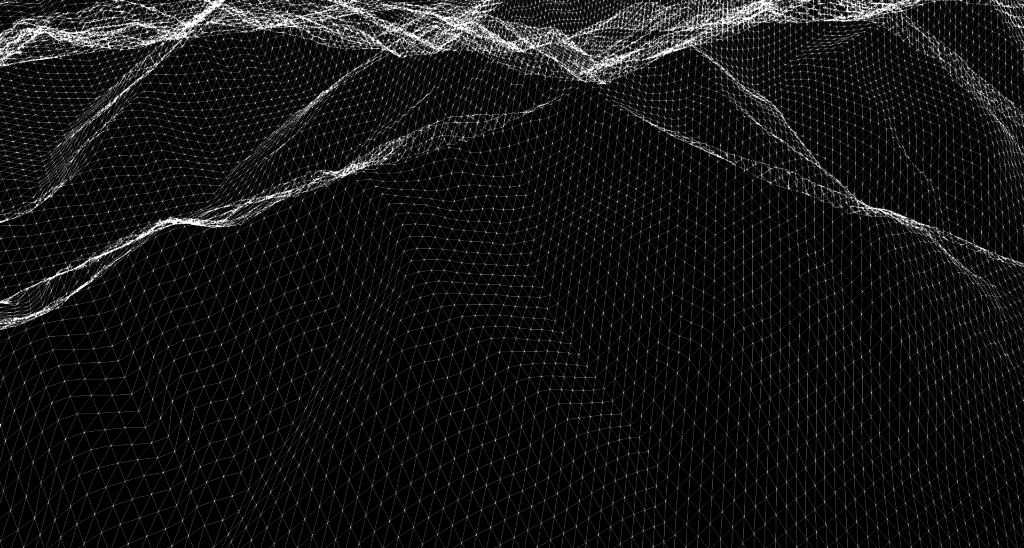
When rendering the grid, each point is raised by the corresponding elevation value from the height map to create the illusion of a complex terrain:
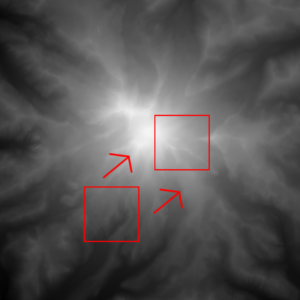
As the viewer moves across the scene, the grid remains centered and only the area within the height map that is used to look up the elevation shifts This allows the grid mesh to be reused regardless of the player’s position within the game world:
This simple approach has some severe limitations though: if we want to render a terrain that fills the entire screen a very large grid is needed. The bigger the grid, the more memory is required. Also, because the grid is centered around the viewer, we are rendering a lot of invisible polygons “behind” the viewer. While modern GPUs are capable of rendering a staggering amount of polygons, it remains important to reduce the number of draw calls made during every frame. Finally, any terrain features which are further away are rendered using the same amount of polygons as nearby terrain, even though they will occupy a much smaller space on screen. This is rather wasteful, so some form of dynamic level of detail (LOD) should be used to reduce the polygon count for more remote grid coordinates.
To address these issues, I decided to implement a clip map as detailed in the excellent GPU Gems series. This approach has a number of advantages:

Instead of rendering a single, large mesh, the grid is split up into multiple levels. At the level closest to the viewer a grid spacing of 1 is used. Each subsequent level is scaled by a factor of 2, thus doubling its size. This allows us to share the same grid mesh across levels, while also rendering more remote terrain using fewer polygons, thus achieving the desired level of detail at each level.
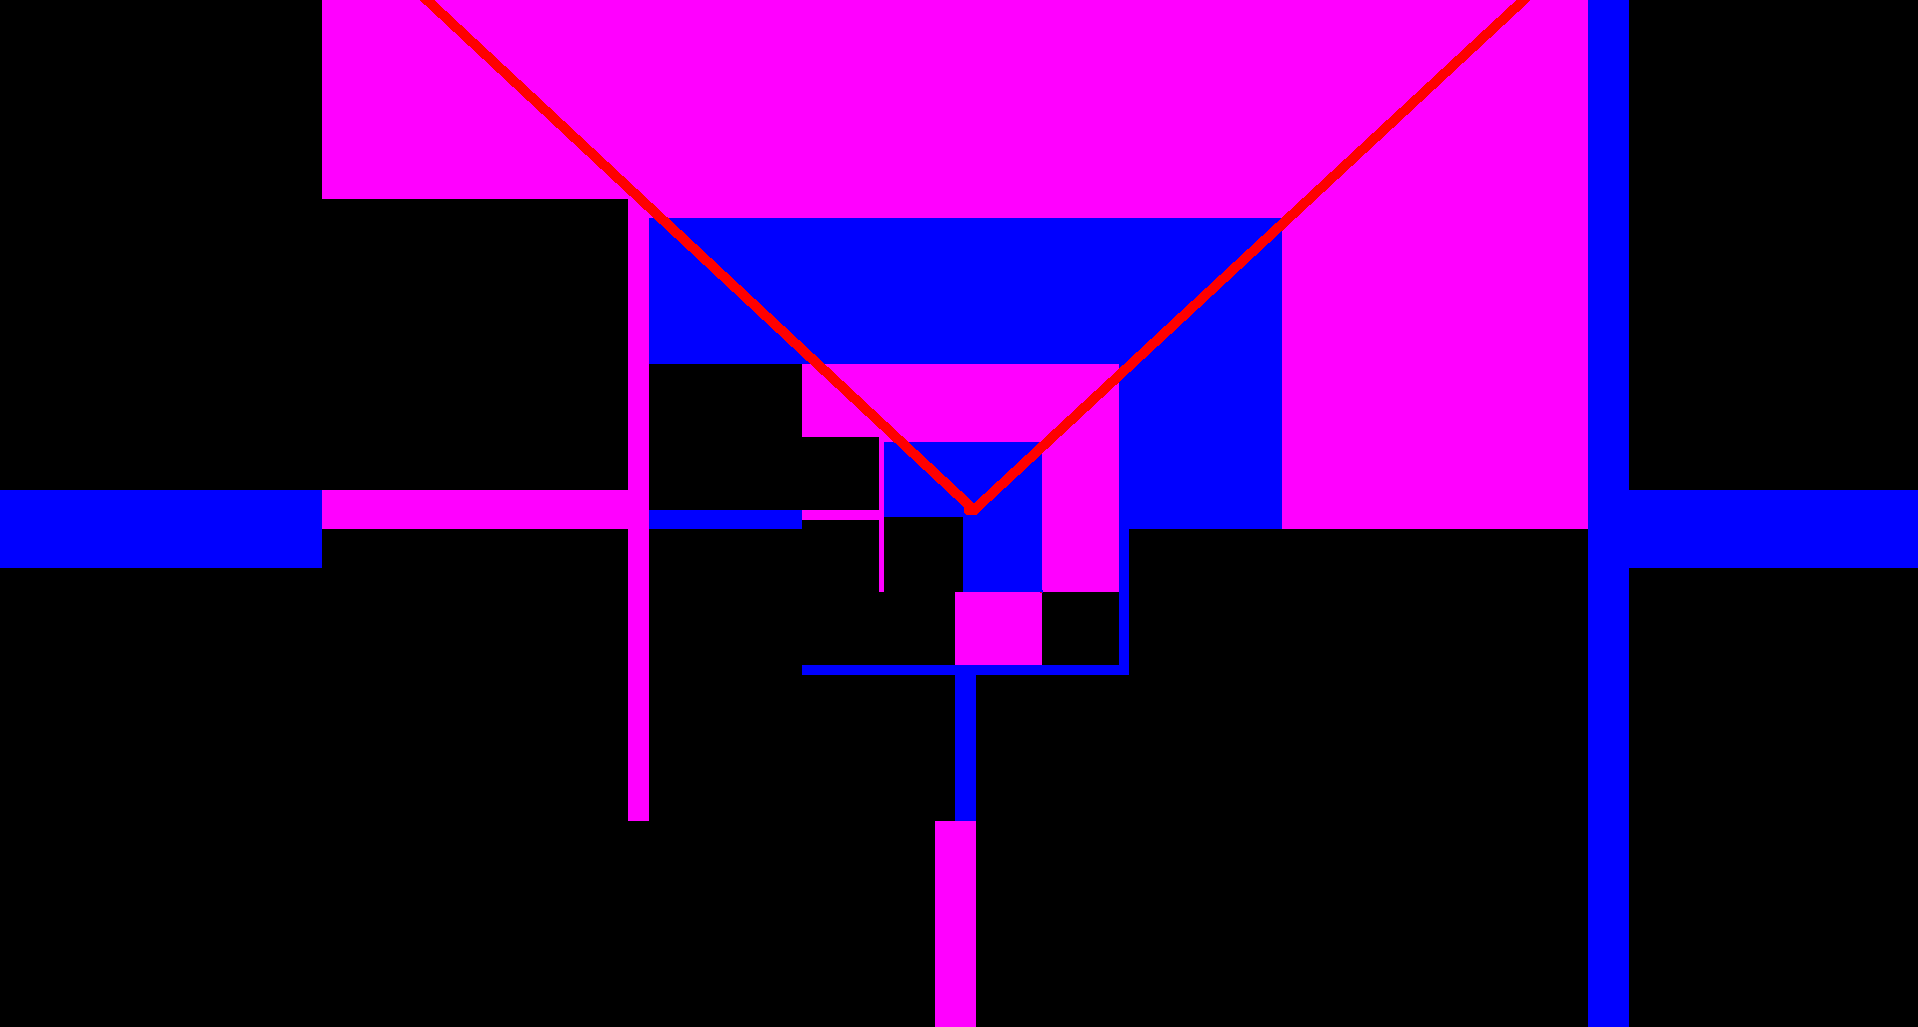
The individual levels are further broken up into smaller meshes, which allows us to exclude any parts of the terrain that are not within the field of view from rendering. In practice, this reduces the amount of polygons that have to be drawn by 50% or more each frame. The following image highlights the field of view of the viewer, as seen from above.
I started the implementation by rendering the various meshes for each level – not that the blocks numbered 1-12 are efficiently reused across levels. Further note that the innermost level is rendered as a special case using 4 congruent blocks instead of 12:

The area of the height map that corresponds to each level is stored in a separate texture. This allows each level to sample the elevation data using the same texture coordinates. Each level’s texture is updated at run-time by filtering the next finer-grained level as the viewer moves around the world.

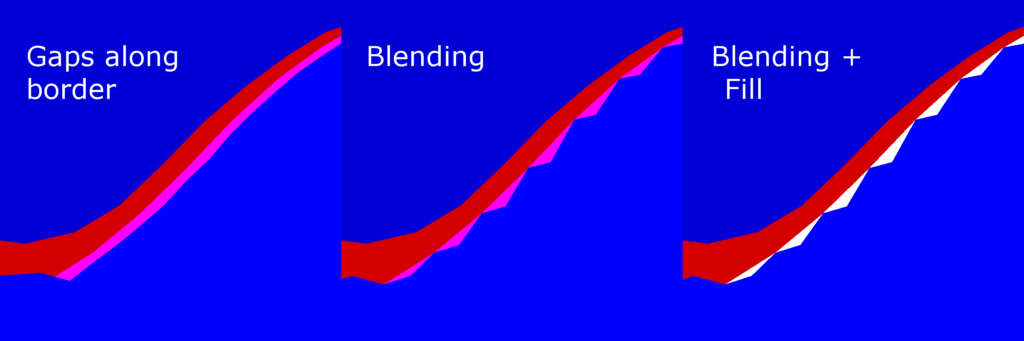
The bilinear filtering used to generated the larger level textures creates gaps along the border of any two levels, as indicated by the pink area below. To mitigate these gaps, I had to blend the grid elevation of the smaller level with that of the next larger within the border region. That alone did not fully fill the gaps, so I had to add “stitching”, shown in white below, to completely fill the gaps.
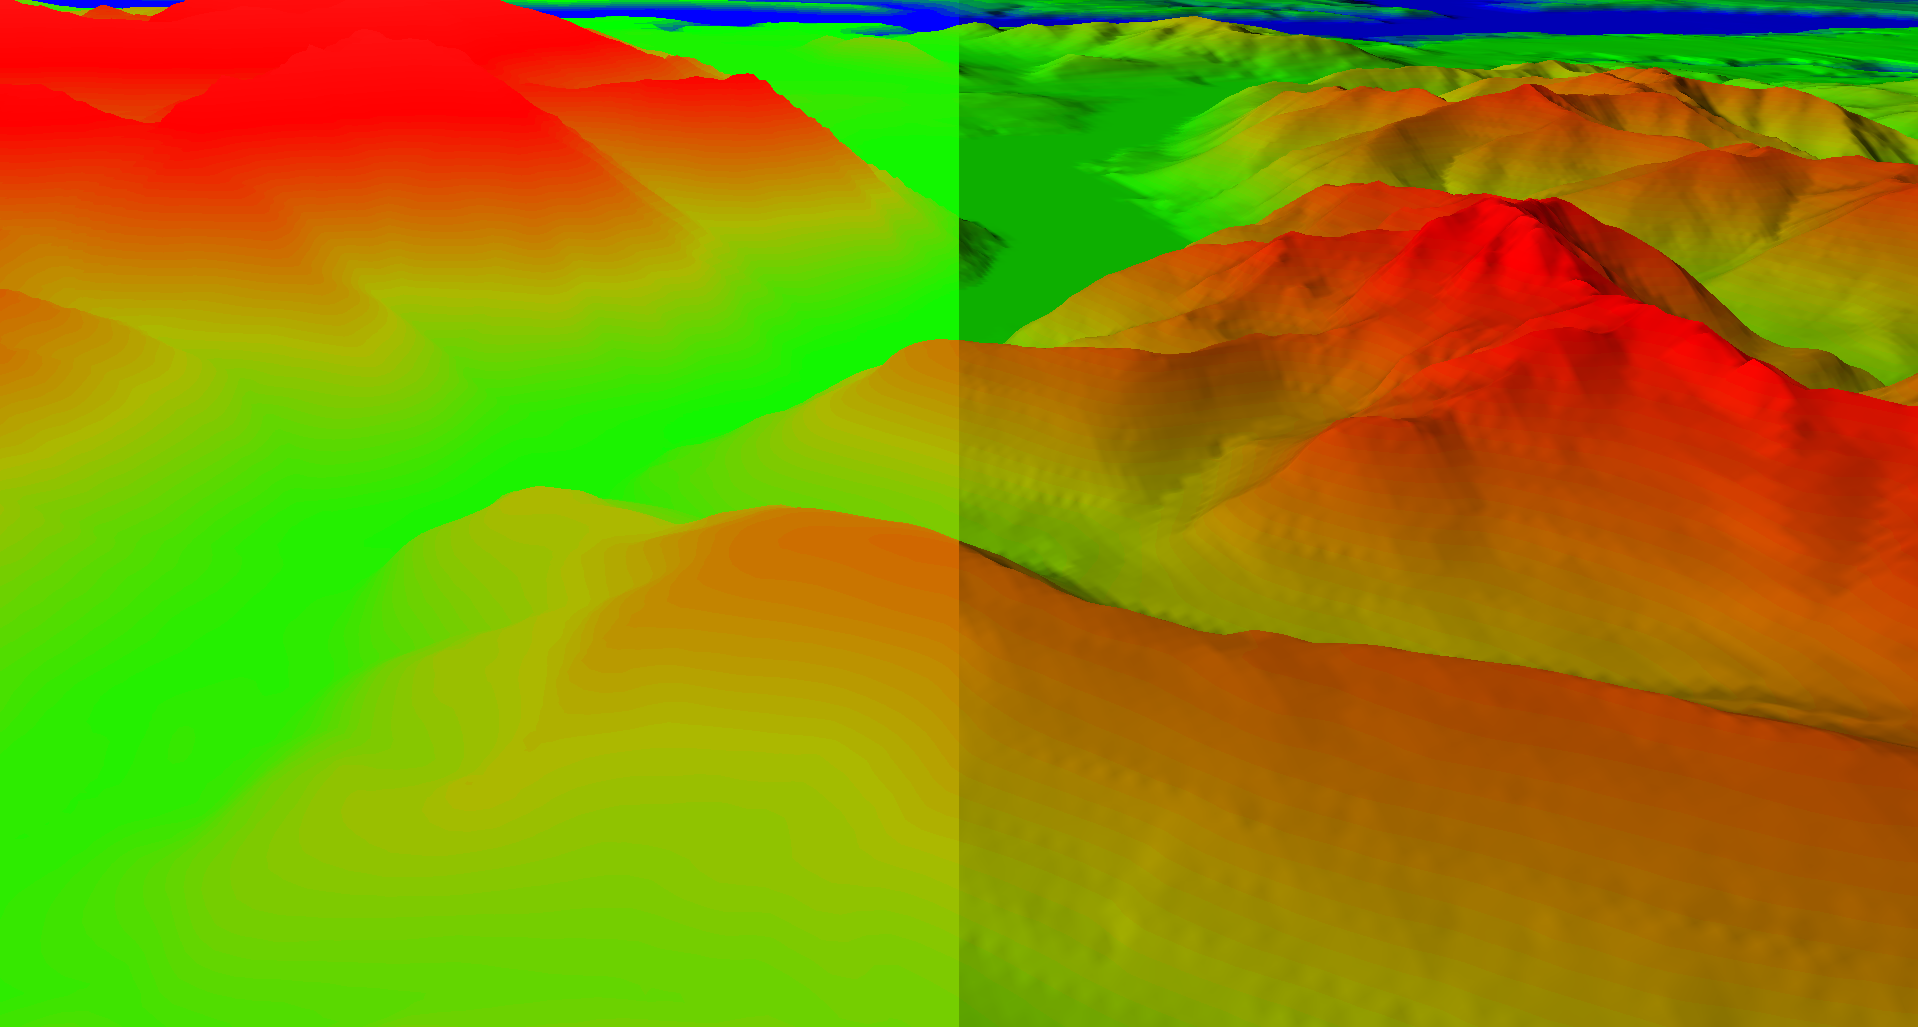
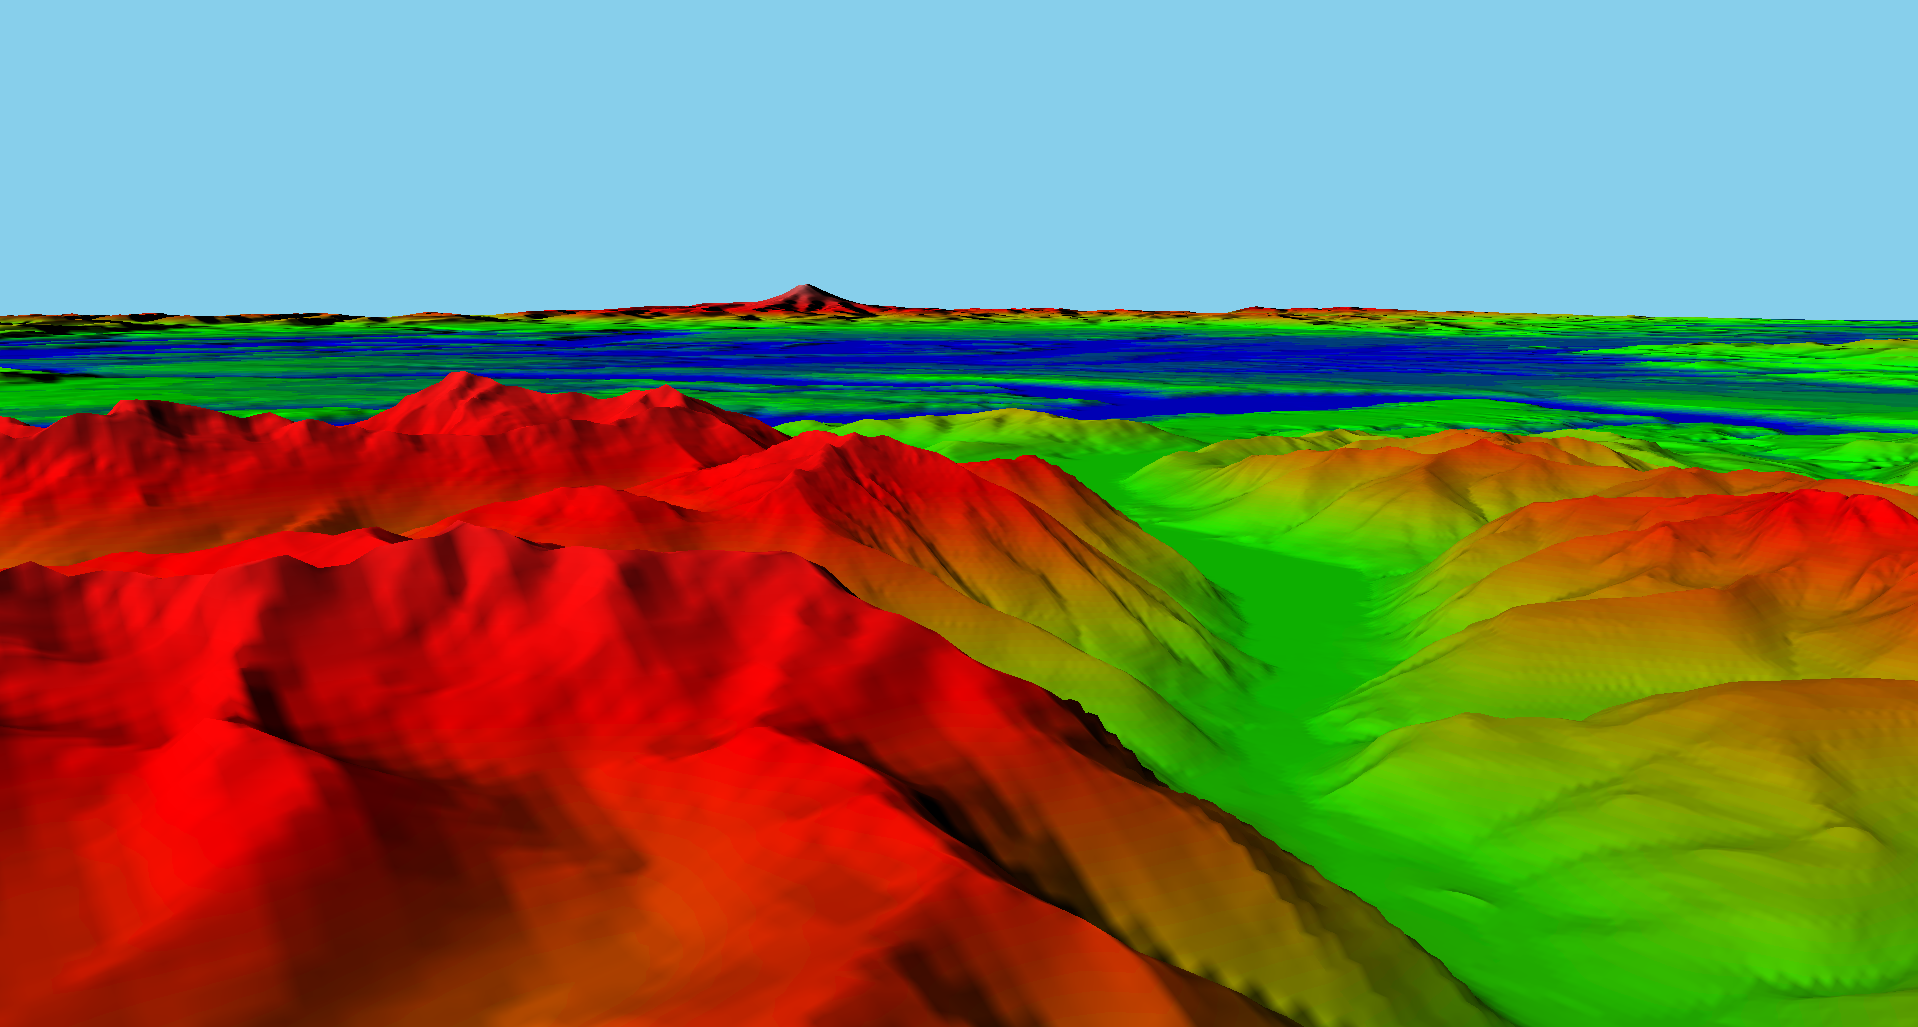
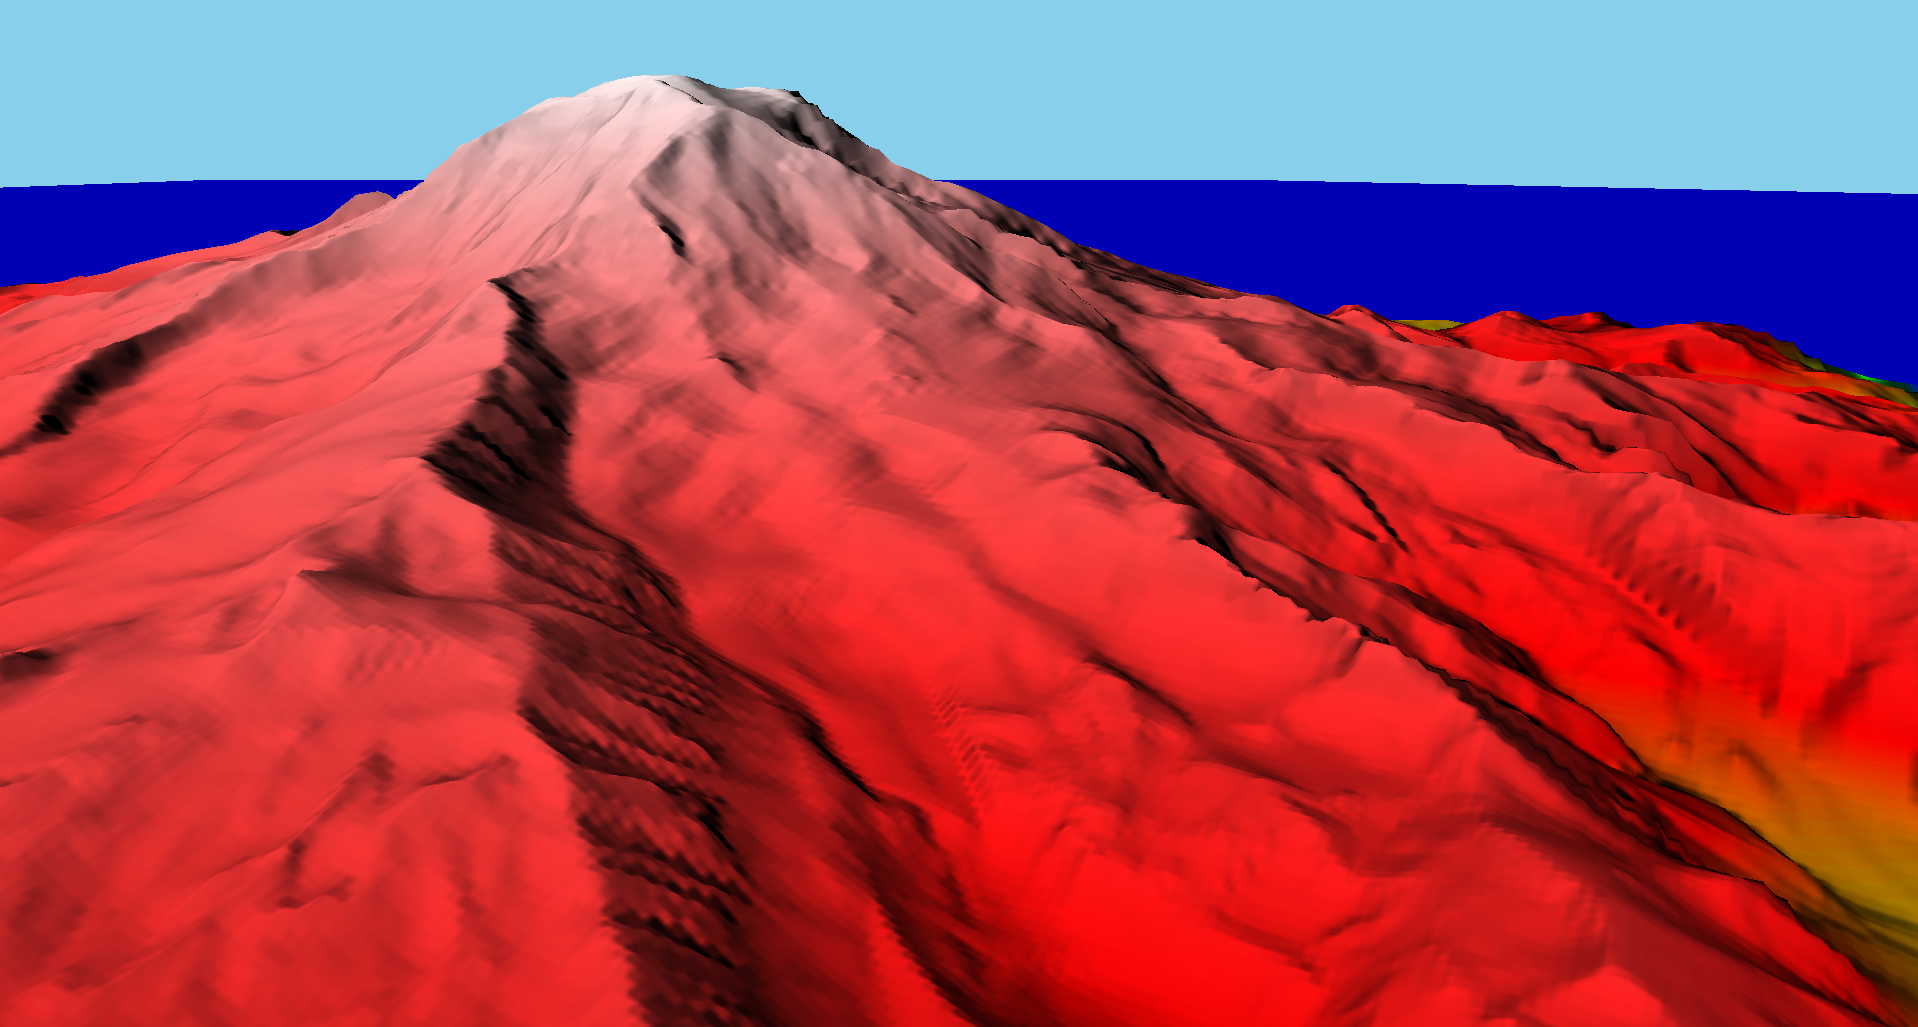
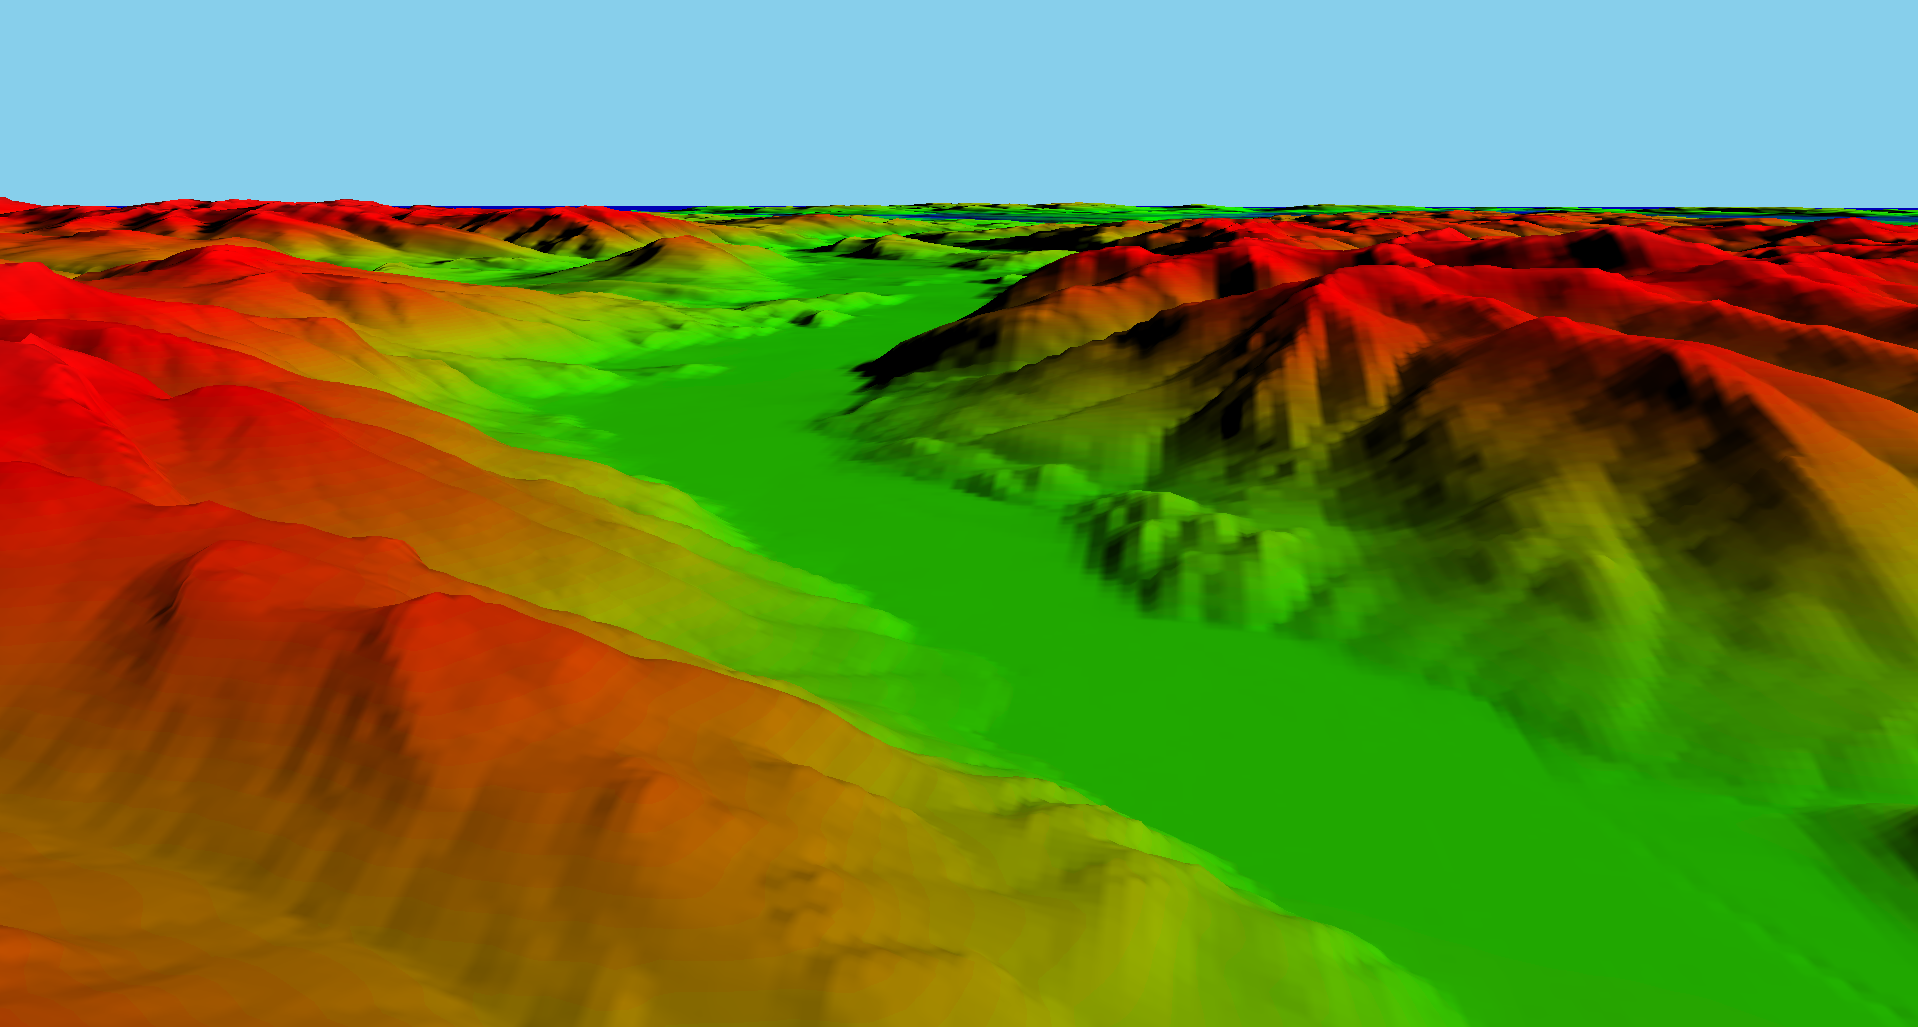
I colored the terrain based on each point’s elevation using a gradient palette, however that left the terrain looking flat as seen on the left side below. In addition I applied a basic diffuse lighting model to create the impression of depth, as illustrated on the right.
Similar to the height map levels before, the lighting model used a normal map texture for each level that is continuously updated as the viewer moves. To create smooth transitions, the normal values along the border of each level are blended using the same coefficient used to blend the grid elevation.
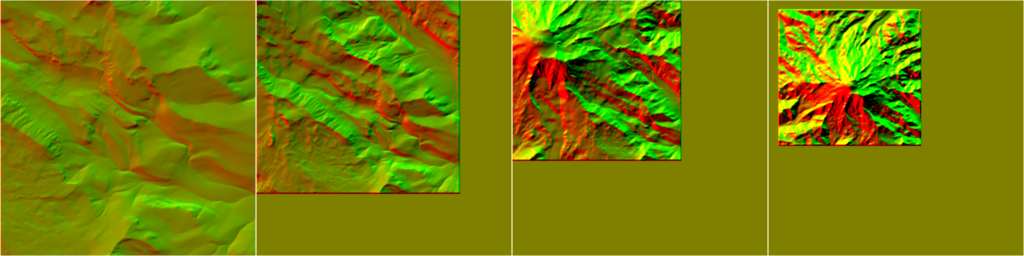
For testing purposes, I used the Puget sound elevation data set from the original paper, as well as a smaller, more detailed height map of Mt. Rainier that I generated here. Here are a few screenshots of the finished terrain:
I’m pretty happy with the overall implementation, although I feel that the clip map made things a bit more complex than I would have liked. While this is mainly due to the various meshes that have to be created and rendered, there is also a tendency for them to shift by a small offset as the viewpoint moves, which adds requires some additional logic to compute the correct coordinates to be used to sample the elevation and normal textures. That being said, the approach has the clear benefit of rendering a constant amount of vertices each frame and providing a good level of detail at any distance.
Another advantage is that the clip map does not constrain the player’s viewpoint at all – it is possible to render the terrain from an overhead angle as well as from a perspective on the ground. That opens up some interesting gameplay features – Dungeon Keeper’s ability to zoom into one of your creatures to see the world through their eyes comes to mind.
Next steps:
- My prototype is currently still doing full updates to the elevation textures whenever necessary, which causes frame rate drops at times. The original paper describes a more efficient way to perform partial updates.
- Instead of using real-world terrain data, I’d like to experiment with algorithms to synthesize terrain. That would allow me to generate new landscapes from scratch.
- I haven’t actually tried modifying the terrain in any way, so that is another area that I’ll be looking into soon
Leave a Reply